|
updated 11/01/2006
Index
Descriptions
of the Scanners
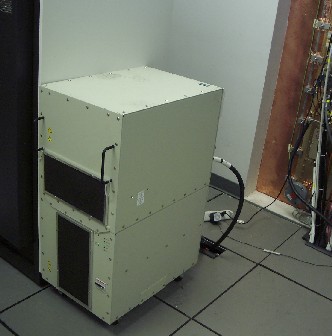
Pictures
of MR2 and MR3 arriving and being installed
The scanner
facilities, which occupy more than 4200 square feet on the first floor of
UMC, are equipped with waiting areas, dressing rooms, and storage lockers
for participant comfort and convenience. The facility includes two 1.5
Tesla magnets and one 3.0 Tesla magnet. The three instruments are
maintained by GE service engineers and currently meet or exceed
manufacturer's specifications on performance. For functional neuroimaging,
audio and visual stimulus presentation equipment is available through the
Resonance Technologies
headphone/goggle
system attached to pharaoh.
A research area, Room
1564 (400 square feet), located immediately adjacent to the 3.0 Tesla
scanner, is equipped with 3 PC/Linux workstations and an sgi O2 for data
transfer and storage, image processing, and data manipulation. All
workstations are networked through a central hub and are protected against
external tampering using firewalls within the UMC computer network.
MR1: a 1.5T GE Signa Horizon LX
equipped with an Echospeed Gradient (33 mT/m amplitude, 120 mT/m/ms slew
rate) running 9X (9.1) software. This system is equipped with a full
complement of RF coils including brain, body, neurovascular phased array,
spin phased array, knee, breast, shoulder, extremity, and torso coils. The
upgrades on this machine have implications for running the scanner and for
image preprocessing (see below). MR1 is the southernmost scanner (the one
furthest from the research area)
MR2: a 1.5 T GE Excite NV-CV/I
with short-bore magnet with a 60 cm open bore diameter, EchoSpeed Gradient
(33mT/m, 120 mT/m/ms slew rate) and 8 channel RF with 8 1 MHz receivers and
special phased-array RF coils to exploit this capablility. It is running
11X software. This system is equipped with a full complement of RF coils
including brain, body, neurovascular phased array, spin phased array,
cardiac phased array, knee, breast, shoulder, extremity, and torso coils.
The system includes advanced data acquisition and processing software for
cardiac and neuro imaging applications. MR2 is the middle scanner.
MR3 is a General Electric 3.0T HD
Signa Excite scanner. It is equipped with Optimized ACGD Gradients (40mT/m,
150 mT/m/ms slew rate running 12x software). It is a 55cm diameter long
bore magnet. This instrument is equipped with a head coil, 8 channel HR
brain array, a phased array neurovascular coil, 8 channel phased array
spine coil, extremity coils (knee and wrist) and a torso coil. MR3 has
mutlinuclear spectroscopy cabability and high order shims. It is nearest
the research space on the north end of the MR suite.
All three instruments
are maintained by GE service engineers and currently meet or exceed
manufacturer's specifications on performance.
For functional
neuroimaging, audio and visual stimulus presentation equipment is available
through a headphone/goggle system from Resonance Technologies.
Scanner Software:
Custom fMRI software for spiral data acquisition is available MR1 and MR3.
Spiral reconstruction software is run on a remote workstation. Several
software packages are available for fMRI data processing including AFNI and
SPM.
The University of Arizona
and GE maintain a research agreement that provides to the UofA software for
MR sequence development and testing (EPIC) and source code of requested
sequences for development.
Spiralio Sequence
Limitations: For the spiralio sequence on
the 3T, the data storage space limit is reached when REPS X slices =
approximately 11,680 for the 8 channel coil and 85,200?? for the quad coil.
In addition, the TR will limit the maximum number of slices regardless of
temporal frames, and then the amount of data storage will limit the
combination of slices and temporal frames. Given that here's a list
of minimum TR values per slice quantity assuming FOV=240. Using FOV=220
will increase the TR by about 20 msecs. You can always use a longer TR, and
the scanner will not allow you to specify a TR with a fractional component.
We suggest you round up.
As of Nov 18,
2005 the
values in the tables all have
"?" to indicate that they are rough unconfirmed
approximations based on doubling of the memory board size from 400 to 800.
The values do NOT account for the effect of heat which may prevent us from
reaching a theoretical maximum.
|
TR
|
Max
Slices
|
Timepoints (Max) Quad coil
|
Timepoints (Max)
8 channel
|
|
1312
|
20
|
4260?
|
544?
|
|
1968
|
30
|
2836?
|
360?
|
|
2624
|
40
|
2128?
|
268?
|
|
3280
|
50
|
1700?
|
216?
|
So for a TR of 1968
yand 30 slices the system can only aquire about 360 temporal frames with
the 8 channel coil; however, reducing slices at this TR increases the max #
of temporal frames.
See the Machine page for updates on the status of
each scanner and updates on the goggle system.
Step
by Step Instructions for Scanner Techs
MRITech Manual
(Word, 1.5 mb) This is a complete instruction guide for running scans using
the new (Post Sept, 2002) interface.
MRITech Manual
(html format for online
display)
See also transfer (special techniques for
transferring images back to the console)
See psd for information about correcting the psd
download error.
The /res binder
contains the troubleshooting steps below but contains additional details.
It is on the shelf behind you as you are sitting at MR3.
Troubleshooting and Reporting Errors
If you encounter
errors during scanning, please submit an error report to the Webboard at Scanners@webboard.ltc.arizona.edu
Also make sure that
the next person in line to scan knows about the problem. Look them up on
the schedule and try to contact them. The most updated CNL phonelist is available under
phonelist the page: http://cnl.web.arizona.edu/glossary.htm#p
(It is password protected). At the very least, leave a note with detailed
information about the problem taped to the console. In addition, you may
report these errors to Scott Squire (ssquire@email.arizona.edu).
Scott is our primary contact for all scanner technical issues.
Ongoing
problems/Status of the presentation system (Hercules or the goggles), the
MR consoles, Mrisun and other equipment will be posted on the Machine page. If GE does service on the scanner,
then we often can't run the next day.
PSD Download Error Our research PSDs are stored
on /res (which is a separate hard disk), thus /res needs to be mounted by
the TPS (the real-time board). However, when GE "does service",
the system automatically replaces crucial system files (i.e., any or all of
the following three files that point to /res):
/etc/fstab
/etc/vxfstab
/etc/exports
If this has happened,
then as you sit at the console as a tech, you'll find you can prescribe
scans, and then once you hit "Prepare to Scan" or
"Download", you'll get an error "PSD Download failed". This means the TPS
can't get to the required PSD.
On each scanner, you
can find backup copies of these three files in /res/system. You will need
to compare the backup copies on res to the active copies in /etc.
Information about
necessary passwords, and other troubleshooting advice should be available
in hardcopy form in the blue 3-ring notebook labeled Res on the binding. It is
on the top left shelf opposite the scanner console. The cover is labeled
'Instructions for restoring Research Sequences, System Startup and
Shutdown'.
Here's what you'll
need to do:
Open Unix shell (right click on desktop, under
'System Tools' open Command Window.
Type (Note, don't type ">", just the bolded
commands):
>cd /etc
Hit enter.
In the event of a complete system restore, our disks under /res will not be
automatically mounted anymore. To find out if /res is mounted, type:
>more fstab
The following line should be present:
/dev/dsk/dks0d3s7 /res xfs
rw,raw=/dev/rdsk/dks0d3s7 0 0
If the line is not present, you will need to edit
fstab as root and add it back in. That cryptic dks0d3s7 notation means scsi
chain 0, device 3, slice 7, which is good for a secondary option disk on
our scanners. The order can be followed from other fstab entries (device,
where to mount, filesystem type, options, fsck/backup priority). In addition
you will need to
>cd /
Check that a "directory" (mountpoint) is
present called res. If not,
>mkdir /res
> more vxfstab
You should see 3 lines, the last of which starts with
/res. If not type 'su' hit enter, type the root password. Hit enter. Type:
>cp vxfstab.old vxfstab
You will see 'do you want to overwrite vxfstab?'
Type:
y
If vxfstab.old is not in
the /etc directory, there is a copy on /res/system. If you had to
replace the line in fstab, then you can't get to /res until you reboot.
Type
>more exports
You should again see 3 lines the last starting with
/res.
If not type
>su
Hit enter, type the root password. Hit enter. Type
>cp exports.old exports
You will see 'do you want to overwrite exports?'
Type
y
Again, if exports.old is not present in /etc, there
is a backup copy on /res. If you had to replace the res line in fstab, then
you'll have to reboot before you can get to the copy in /res/system.
To check that your changes have been made, type
>more vxfstab
>more exports
If you replaced any files, type
>stopmon
Hit enter. Several messages will scroll past. When
finished, at next command prompt, type >endsession -f
System will reboot, login as usual.
If those steps do not appear to work, then reboot
the scanner:
To reboot the 3T
choose Tools->System Shutdown.
If you get the following error after reboot:
"Download of
the prescribed series failed.
RD door switch and PDU status are not
being monitored.
Communication failure between Host
and 3T Power Monitor was received by the
HOST. Error 229003. Wrong response
from the 3T Power Monitor. Reset from the 3T PC may be necessary."
You need to reset the SAR monitor. The
communication between the host and power monitor is important. After a
restart/reboot, the SAR monitor (a small PC between Pharaoh and the
console) must be placed in 'Operate' mode not "Standby" (or the
scanner won't run). The SAR monitor requires a username and password:
id: 3t
password: (the same as the console)
wait until the processes end and MODE shows yellow "STANDBY",
then click "OPERATE" button. MODE should change to
"OPERATE"
now.
The RF door switch
and pdf monitor messages always occur, there is a switch which can turn off
the scanner if the door is opened--it is disabled. So don't worry about
these.
For times when rebooting MR3 is difficult:
1) Left click console-service tools->system
shutdown
OR
2) If you right click on any desktop space and under
Service Tools select the Command Window menu option a c-shell will open,
you may then type 'stopmon' after that executes type:
>endsession -f
The system will reboot. at the It is now safe to power down, hit any key to
restart message the scanner can be powered off. It is always best to take
the extra few minutes to cycle the power to the system and make a fresh
start.
OR
3) If the system is entirely unresponsive, you must
go into the backroom and shut it down.
SHUTDOWN FROM THE BACKROOM: Whichever of the above
procedures you've had to follow, now do this: Go to back machine room, hit
red power off button, wait 30 seconds. Turn "main circuit breaker
current adjust switch" to green and then back to red. Hit green emo
reset button.
You'll then need to reset the SAR monitor. You may
need to power on the SAR PC:
Below the SAR monitor, open left cabinet which will contain a PC. Hit the
power button. Also note that the power button switch for the PC monitor is
on the side of the monitor.
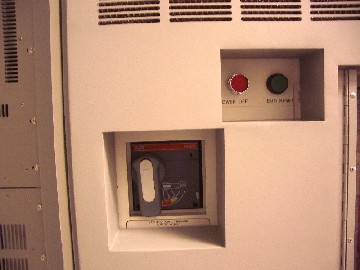
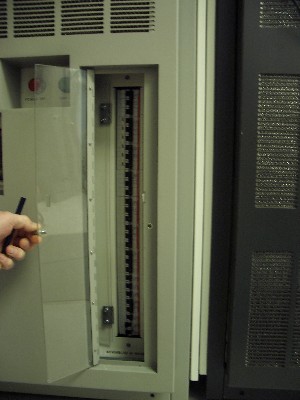
In the main system power box, the circuit breaker
switches for MR3 should be in the "on"
position. However, the bottom two circuit board switches labeled
"Spare 1" and "Spare 2" should not be on:
RF AMP ERRORS
During power cycling, the RF amp may not activate
immediately. Sometimes it
will decide to come back on on its own after 15-20 minutes, but to avoid
the wait you can 'force' it to go active by turning it off, waiting 10
seconds and then turning it back on. If this is done at the initial power
on phase from the backroom, the system will come up fine. If you do not
catch the problem before logging back on to the system, and get an RF-amp
error on the
console a TPS restart will usually be required after flipping the amplifier
off, waiting the 10 seconds, and then turning it back on.
Caution: There is 120,000 volts of electricity
coursing
through that equipment, make sure your hands are not wet while playing
with the circuit breakers!
If you receive RF amp error, flip RF/AMP
circuit breaker switches off and then
on, then hit green EMO reset button. If you do
get an RF amp failure you should turn the RF
amp off and wait 10 seconds before switching it
back on.
The waits are to allow any residual power to
dissipate and
preserve the equipment.
=================================================================
Another Error you might
encounter (but not related to the above)
System disk is too full, applications will not be automatically
started When
you start up the scanner, and log in as signa, you may get confronted with
the above message. The only button is "OK", so hit that, and you
are dumped to a desktop, with no buttons/etc available.
Right click, go to system tools, and hit "Open Unix Shell". Type:
>df
and you should see the /usr disk is mostly full.
Type
>cd /usr/g/mrraw
Hopefully, this directory is full of Pfiles and links. The links are
annoying, but don't take up much space at all. Remove all the Pfiles, or
move them to mrisun, the /res disk, etc. Right click again, and go to
"shutdown". Now next time you start it up, all will be well.
Scheduling
Updated Oct 1, 2003
- MR1 will be available to
researchers on Wednesdays, 24 hours a day
- MR2 will be available to
researchers on Thursdays, 24 hours a day
- MR3 will be available Friday
through Tuesday, 24 hours a day
- MR 1 and 2: On weekends, one of the
1.5T systems should also be available for research as long as the
other is available to the clinic. MR1 has easier access for patients
who are on a lot of equipment, so it is possible that the clinic will
need MR1 (and not MR2) under special circumstances. (Simply check the
schedule for both MR1 and MR2, then go ahead and sign up for one
machine if the other is free. The clinical techs also check our
schedule. In an emergency, you could still be booted off a machine,
but this should be infrequent.)
-
- Clinical staff have
access to our OCR scheduler, and they will have permission to schedule
a scan on the day they need it. The implication is that you should not
wait till the last minute to sign up for magnet time. Try to sign up
at least one day beforehand.
- MR1, MR2 and MR3 are
always available at night from 10 pm on...the scheduler had trouble
understanding 12 am, however, so now the scheduler lists the resources
as available from 10 pm to 11:30 pm. You are welcome to schedule that
time and then stay as long as you want. You'll only be charged for the
1.5 hours. On the weekends, MR1 and MR2 will be available after 5pm.
- OCR Scheduler
(Same as "New Scanning Schedule" button).
- Starting
October 11, 2003:
- MR1 will be available
any time after 1:30 pm on Saturday
- MR1 will be available
Sunday morning until 1:30 pm (and then after 5pm).
- MR2 will be available
until 1:00 pm on Saturday morning (and then after 5pm).
- MR2 will be available
any time after 1 pm on Sunday
- GE Service for MR1 will
occur Nov 5, and Dec 3, from 5pm until 9pm.
- IMPORTANT:
After you sign up, you will not actually be able to schedule yourself
until you have administrative approval. You can contact Scott Squire (ssquire@email.arizona.edu)
and give me your username. I'll go in and approve you.
Safety
Metal: No ferrous metal in the
scanner room. Small objects may be particularly easy to overlook (e.g.,
paperclips). If you hear anything get pulled into the scanner, even if you
can't see it, please let Ted or Art know. Have a look at some pictures of
things stuck in magnets here.
Cables: Don't allow any cables to
lie in the scanner with a loop in them (this goes for the mice, goggles and
audio). Cables may become excessively warm if they cross themselves.
Skin: The patient's/subject's skin
should not touch the bore of the magnet because it may get warm. Cover
upper arms and elbows with towels or a blanket to prevent contact with the
bore.
Crossed Body parts: Arms and legs should not be
crossed as they may create an electrical circuit if crossed (which will
make their skin crawl and may upset subjects).
Hearing Protection: Hearing protection should be
provided.
Cell Phones: Turn cell phones off, even
in the console room.
Links: More Information about
safety can be found at http://www.mrisafety.com/
Warmth in MR3: The upper limit for the 3T
patient comfort sensor has been increased to 37 deg. This should allow
studies to be completed without imposing a 10
minute wait after the functional runs. Please be sure to warn
subjects
that if they start to get too warm to notify the operator (Though the
likelihood of this is extremely small).
Etiquette: Perhaps this isn't really a
safety issue, but it is important nonetheless. Scanner time is expensive,
and it is important to respect other researcher's time. If they are signed
up, then they run the console room. You need to respect that, don't stand
around talking in the room and don't start setting up your stuff during
their time (unless you clearly establish that they do not mind).
Emergency
In the event of a
fire:
- R-Rescue-Remove
Patient/Subject from scanner
- A-Alarm-Phone #84 and
report fire
- C-Contain-Close Doors
- E-Extinguish-Use fire
extinguisher if possible
Security emergency
(e.g., unruly/dangerous patient): Call 4-6533 or press the security button
on the wall.
If a patient/subject
"codes" (dies or has a heart attack) while in the magnet, the
code team should be alerted by dialing 4-5000. Remove the patient/subject
from the MRI scanning room and start CPR.
Quenching the
Magnet: There
is a big red button in the magnet room that can take the magnet down in
about 30 seconds IN AN EMERGENCY. The choice to do this belongs to the
tech. Generally, this choice would be made only if someone was pinned and
being hurt. It takes several weeks and $20,000 to $30,000 to bring the
magnet back up after it is quenched.
New
Image Properties and Implications
(since
September, 2002)
Functional Images
There is a
new grecon package for functional image processing on
MR1 and MR3. To get a copy of the relevant code (grecons for sun, linux or
sgi, expandonefile and sprlioadd for sun and linux, some instructions as
pdf files) you must be part of the CNL.
See also prep scripts
On merlin, holly and
buddy, you need the program grecons (to reconstruct images from MR1 or
MR3). If you type the following at the prompt:
>grecons
you'll see your
options. To reconstruct a typical functional image on one of the sgi
machines, type:
>grecons
P12345.7
This will produce the
typical deluge of thousands of little image files, but if you are not
working on a sun or a linux machine, it is probably your best choice.
If you are working on
a sun or linux machine, then you may wish to use the -O option to
reconstruct into a single *.mag output file. You'll need two other
programs, expandonefile and sprlioadd (which are only available for sun and
linux) to extract images from a *.mag file. expandonefile is needed
for extraction. sprlioadd is used to handle spiral_in_out sequences.
If you run grecons like this:
>grecons -O
P12345.7
then output will be a
single file, P12345.7.mag (-O says make this one big output file).
Unless you can get to a sun or linux machine with expandonefile, you don't
want to use the -O option.
If your file is a spiral_in_out (a.k.a. spiralio) from the 3T, then you will want
to use sprlioadd next. If you were to just run grecons on a spiral_in-out
sequence, you'd get twice as many output files as you expected (an in and
an out for each image). sprlioadd can fix this for you, and also allows you
to choose some interesing weighting modes (details covered in pdf documents
distributed with the code). Here is an example:
>sprlioadd -O
P12345.7.mag tap1 80 17
If you are doing all
your processing on a linux machine. Simply do your byte swapping in afni
(The -B option won't help you unless you ran grecons on sun or sgi and then
moved the resulting file to linux. If you have some other combination of
programs that demand you worry about byte
swapping...test until you find a sequence of steps that works nicely.
- -O tells the program this
is one big *.mag file
- P12345.7.mag is the name of the input
file
- tap1 is the name of the
output file
- 80 is the ntr (number of
repetitions)
- 17 is the nas (number of
anatomical slices)
To extract data from
*.mag, you run expandonefile (remember, only on linux or sun right now)
like this:
>expandonefile
tap1 out 17 80 64
- tap1 input name (would
probably be P12345.7.mag if you didn't use sprlioadd)
- out name of output file
- 17 nas
- 80 nfs
- 64 #pixels in one dimension
November 6, 2003:
Upgrades to Grecons for the 3T Only
The spiral and
spiralio sequences on the 3T have been upgraded. To reconstruct P-files
produced by this new upgraded code, you'll need a special version of
grecons.
Unfortunately, this
new version of grecons does NOT work on P-files produced by the earlier 3T
sequences. Nor does this new grecons work on P-files produced by the 1.5T.
If you will be using
the spiralio sequence on the 3T, you will need an
additional piece of code, the new expandonefile.
It appears that
spiralioadd (yet another piece of code used for reconstructing
spiralios) has NOT changed...so you don't need a new copy of this.
For more information,
see the note to the imaging_analysis listserv, 11/06/2003, entitled
"New 3T scanner code, read carefully".
See Prep Scripts on the Glossary page for
information about helpul shell scripts.
Grecons Table
|
Date
scan collected
|
Scanner
|
grecon
version
|
expandonefile
|
spiralioadd
|
|
Prior to 9/2002
|
1.5T only
|
greconss5x
|
NA
|
|
|
9/2002-11/2003
|
1.5T or 3.0T
|
grecons
|
expandonefile
|
sprlioadd
|
|
After 11/2003
|
1.5T
|
grecons
|
expandonefile
|
sprlioadd
|
|
After 11/2003
|
3.0T
|
grecons_v2
|
expandonefile_v2
|
sprlioadd
|
|
After 6/2005
|
1.5T only
|
grecons_mr1
|
expandonefile_mr1
|
sprlioadd-mr1
|
|
After 9/15/2005
|
3.0T only
|
grecons12
|
expandonefile_v2
|
sprlioadd
|
Structural Images
There are new
naming conventions for the structural images. This has implications for
some scripts. In particular, Jen Johnson discovered that the rename_anat
script we use needed some modifications and she revised it and tested it.
The new version, rename_anat2, is here. rename_anat2 works on
MR files that use the lower case i in the name. The more general file, rename_anat3
(which is a little harder to use since you have to specify the name up to,
but not including the numbers that change) can be found here as well. If your MR
files don't use the i or the I in their names, then you should use
rename_anat3. rename_anat3 is already distributed to buddy, holly and
merlin. The original rename_anat assumes that your files have the
.MR suffix. Read more about the original rename_anat on the afni anatomical preprocessing page.
Also keep in mind
that only afni expects/depends on this renaming. Do NOT rename the anatomy
files if you are using spm.
>rename_anat2
E14418S2
(this assumes a lower case i comes next)
>rename_anat3
1234.1.1. (this
assumes nothing about the characters preceding the part of the filename to
change)
MR2bshort2 will handle converting
structural images from the default letterless format used since September
2002. On buddy, holly or merlin, type MR2bshort2 for instructions and an
example of how to run it.
The structural images
have a new header size. File size is now 139504
bytes.
139504-(256*256*2)=8432 (the new header size).
Afni Users: There are implications for
constructing briks in Afni, and perhaps for other programs as well
(information will be forthcoming). See Afni FAQ #12
Once you understand
the "3D:" type of input specifiers, you can set up your Unix
environment to recognize certain file lengths as corresponding to a given
image format. For example (using C shell syntax)
setenv
AFNI_IMSIZE_1 139504=3D:-1:0:256:256:1:
means that a file
containing 8272 bytes will have the string "3D:-1:0:64:64:1:"
attached to it before being read by the image input routines. In this case,
this would correspond to a single 256x256 image of shorts, with an 8432
byte header to be skipped (139504-256*256*2). Once this is set up, all the
AFNI package programs that read image files will automatically recognize a
file of this length, with no further need to explicitly use the
"3D:" specifier on the command line.
Simply place the
above line in your .cshrc and source the
.cshrc. You should find that you can now read the new structural files.
SPM
Users: There
are implications for you as well. If you use a script like efl2ana to
convert your MR files to SPM images, then you may need to edit the offset
value in that file so that it is 8432 instead of 7904.
The filenames now use
a lower case "i" (or nothing at all) rather than the upper case
I, you should change your commands accordingly.
Updated M files are
available at Local
Downloads They are called t12spm_new.m and t3d2spm.m. They are for the
T1s and 3Ds respectively. t12spm_new.m adds slice thickness as the final
argument, has the 8432 offset and assumes the files do NOT have the .MR
extension. t3d2spm_new also has the new offset and assumes there will be no
*.MR extension. Note the final "." in the filebase name.
e.g.
>>t12spm_new('3852.4.1.',27,2,'brain.img','no',1,27,3.5)
>>t3d2spm_new('3852.2.1.',124,2,'brain3d.img','no',1,124)
More
than 9,999 Images Problem
This is a problem
that we (Thanks go to Scott and Cari for being on the bleeding edge...and
to Jen for identifying the problem) are beginning to encounter as we now
have the ability to collect more slices in the same TR.
For afni users,
several scripts in the afni processing stream assume that there are 9,999
images or fewer. rename_spiral has been rewritten into rename_spiral2
(available here)
but other scripts are not fully tested.
For SPM users,
phx_tospm does not handle more than 9,999 images. New versions of phx_tospm
are now available in Local
Downloads: phx_tospmb.m phx_tospm3b.m and phx_tospm4b.m
(b=big). The b versions are intended for P-files with 10,000 or more
images.
Such giant sets of
files will need to be renamed with rename_spiralb (available here) rather than
rename_spiral, which are available in the same place. "b"
versions of phx_tospm have been installed on buddy, holly and merlin. You
may wish to use prep (to run grecons and
rename_spiral) or prepb (to run grecons and rename_spiral2). Simply type
prep (or prepb) at the prompt on buddy, holly or merlin for help. To learn
more about new afni shell scripts. Go here.
MRISUN
and Tommy
You can burn
cds at the hospital on mrisun or tommy Instructions.
There is also a Windows machine available over there with a DVD burner.
|