| Mask
Links
Afni
Masks
SPM
Masks
Masks
in Afni
This
webpage is not a substitute for that tutorial, nor is that tutorial
a substitute for this page. (See the Afni Masks link above.)
Afni
offers specialized tools for creating masks on high resolution anatomicals.
You can
- Freehand
draw a mask (see below) or,
- If
you use talairached images, you can select a brain region
or group of brain regions (see below)
to be included in the mask (the above tutorial describes these
functions in detail and provides helpful screenshots).
The
tool 3dfractionize can be
used to convert these high resolution masks to lower resolution.
The conversion is necessary if you intend to multiply
a lower resolution image by the mask.
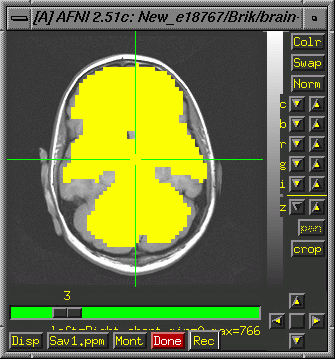
3dAutomask
automatically creates a mask of brain from a 3D+time image. The
resulting image is a 3D fim (functional) image with 1's in the brain
and 0's outside. Such an image can be overlayed on an anatomical
to see signal dropoff or can be used like other masks to filter
an image.
3dcalc
can be used to multiply an image of
interest by the mask you create.
Mask
Multiplication
Each
slice of an image is a matrix (square or rectangle) of numbers...0=black
(no activation) and other numbers represent levels of grey. A mask
is usually binary: it only has 1's and 0's in it, and 0=black and
1=white. To multiply two images, you dot-multiply the two matrices,
which means that the top right number in one matrix is multiplied
by the top right number in the other matrix, the second in one matrix
is multiplied by the second in the other matrix, etc. To multiply
two image matrices, those matrices should be the same size--i.e.,
same number of slices and same number of voxels in each direction.
If you are multiplying an image by a binary mask, then any value
in the original image is retained if it is multiplied by 1 but zeroed
out if multiplied by 0. e.g.,
|
Binary
Mask
|
*
|
Activation
Image
|
=
|
Masked
Image
|
|
0
0 0 0
0 1 1 0
0 1 1 0
0 0 0 0
|
|
0
2 0 0
0 3 0 4
1 1 3 1
0 0 1 0
|
|
0
0 0 0
0 3 0 0
0 1 3 0
0 0 0 0
|
In
our example, 2 4x4 matrices are multiplied. The binary mask matrix
serves to filter out any values in the activation image that occur
outside the inner rectangle.
Afni
Tutorial Data
You
can use data from the afni tutorials to play with masking. Create
a directory to work in and put all these files in the directory.
To really appreciate what talairaching does for you, you should
initially dump the tlrc files in a separate subdirectory (If you
don't afni will find the talairached files and allow you to do all
talairach related options). Go here
for:
-
2D anatomicals: brain+orig.BRIK and HEAD and brain+tlrc.BRIK
and HEAD
- 3D
anatomicals: brain3d+orig.BRIK and HEAD and brain3d+tlrc.BRIK
and HEAD
- An
analyzed functional image (a 3D fico image): study1_block80_norm_p05_150ul+orig.BRIK
and HEAD
Go
here
for:
- A
functional 3D+time image (this is the result of preprocessing
but before analysis): study1_norm+orig.BRIK and HEAD
Freehand
Hi-Res Binary Mask in Afni
Data:
- brain+orig.BRIK
and HEAD to draw a mask
- study1_block80_norm_p05_150ul+orig.BRIK
and HEAD as a template file for 3dfractionize
- study1_norm+orig.BRIK
and HEAD to multiply by your mask
Procedure:
- Open
afni and choose Define Datamode->Plugins->Draw Dataset.
- In
the Draw Dataset interface, select the brain+orig file to draw
on.
- Use
the middle mouse button to draw and fill shapes.
(If
you intend to convert it to low resolution you will need big bold
shapes and/or you may need to play with clipping in the 3dfractionize
command). For example, you might draw a good sized filled box
in the upper left corner of slice 5.
- Use
"save as" to give the result file a new name (e.g.,
mask).
- Insides
of filled shapes are 1's by default. Everything else is 0's in
your mask. (If you want more options, read the tutorial mentioned
above).
Convert
your Mask to Low Resolution
(e.g.,
64x64xNAS)
You can create a courser grid file from your above ROI drawing:
>3dfractionize
-template study1_block80_norm_p05_150ul+orig -input mask+orig -clip
0.5 -preserve -prefix outfimfunc
Pick
a functional template from the same run, use your mask as
input, preserve the original data inside the mask
and designate a prefix for your output. The output (e.g.,
outfimfunc+orig) is a sea of zeros except for your designated mask
voxels, all nicely aligned to their new 4D parent. The
output will be 3d low resolution.
By
using a fim file (post-analysis) as your template, your output will
be a fim functional file which you can overlay on an anatomical.
To
learn more, you might also type:
>3dinfo
out*.BRIK
Apply
the Binary Mask to a Functional File
>3dcalc
-prefix calc_out -a study1_norm+orig -b outfimfunc+orig -expr 'a*b'
Multiply
a file by the binary mask to create filtered output (e.g. calc_out).
In this expression, we multiply the original epan image (study1_norm+orig)
by our mask (outfimfunc+orig) and generate calc_out+orig. calc_out+orig
is a sea of 0's except that the raw data from study1_norm+orig is
preserved wherever outfimfunc+orig =1 (e.g., a square in the upper
left corner of every timepoint in slice 5). Note that afni compensates
for the fact that these two files are different sizes (outfimfico
is 3d, but study1_norm is 3d+time). calc_out
is 3d+time.
Afni
Talairached Data and Structure ID
Data:
- Copy
the talairached files into your working directory now
Procedure:
- Open
afni and select "Talairach View" from the top right
of the main panel.
- Choose
Define Datamode->Plugins->Draw Dataset. The lower third
of the Draw Dataset Panel is no longer greyed out because now
tlrc images are available.
- Choose
"Copy Dataset" Zero Func AsIs. (The dataset you will
be drawing on will be a functional overlay named COPY_brain3d,
a fim file)
-
Select the brain3d image in +tlrc. Make sure that COPY_brain3d
is displayed as the image you are working on.
- Now
click on the axial, coronal and sagittal buttons on the main panel.
- Make
sure you are displaying brain3d in the images
- Right-click
one of the axial, coronal or sagital images, and from the popup,
select "Atlas Colors". This will take a little while
to load.
- Select
some distinctive colors for structures (e.g., red for hippocampus,
green for amygdala).
- Name
the file to save (e.g., test) and load it to make sure it will
apply. Click "Done".
- From
the 'Draw Dataset" Panel, choose TT atlas regions to load
(e.g., Since we have designated distinctive atlas colors for them,
choose "Hippocampus" and then "Load:OverWrite".
Do the same for the amygdala.
- You
will want to "save" the image. Click "Done"
to close the Draw Dataset Panel.
- Choose
"Define Function" (but NOT "See Function")
and then on the lower right of the define function panel, choose
"See TT atlas Regions".
- If
you selected "See functions" then all of your color
choices in the atlas are meaningless...colors will be selected
from the intensity colorbar (so you'll probably see all your selections
as yellow....turn "See Functions" off.
- It
does not matter which functional file you have selected, because
you are not viewing functions. If you have trouble, try clicking
"See TT Atlas Regions" on and off to refresh the image.
Make sure your color scheme is loaded (right click the image and
choose atlas colors again to make sure your color chaoices are
displayed). If this doesn't work, try restarting Afni. Be patient
with yourself as this can be a little tricky, but quite worthwhile.
- Unless
you reset the default "drawing value", it will be "1".
This means that no matter how many anatomical structures you add
to your picture, and no matter what pretty colors you choose for
them, you are still creating a 1/0 binary mask in which filled
anatomical structures have the value "1" and everything
else is "0". You can use this binary mask with 3dcalc,
just like you would use any other binary mask.
Looking
at Signal Dropoff
If
you would like to view the functional image as a mask over a high
resolution image, proceed as follows:
First,
make sure anatomical images are aligned with the spirals (functionals).
By default the 2Ds (T1's) are aligned with the spiral images. The
3D needs to be centered and aligned. See instructions
for aligning the 3Ds. Run 3dAutomask on the preprocessed spiral
image:
>3dAutomask
study1_norm+orig
The
result will be a fim image (typically 64x64xnas). Afni will name
it automask* by default and treat it as a functional image.
>afni
Display the high resolution anatomical image, choose "See Function"
and select your automask:

You
could, of course, also multiply your functional activation image
by the automask to remove all data outside the brain.
SPM Masks
In
SPM, imcalc is the analog of 3dcalc in afni.
imcalc allows you to perform various algebraic functions on images.
For example, imcalc will allow you to perform Matlab dot multiplication
on two images with a command like this to imcalc:
i1
.* i2
(where
i1 is the first image you select in the spm interface and i2 is
the second image).
Matlab
dot multiplication is exactly what is described above in the section
on multiplication.
Marsbar,
a freely downloadable and well documented toolbox for spm comes
with a library of anatomical masks in mni space. These can be converted
to img files and then multiplied with a subject's img file to get
a mask of that subject's values for the particular area.
(e.g.,
convert the mni_left hippocampus file to an img file and dot multiply
that image and your subject's functional image together to create
an image of your subject's intensity values in the hippocampus only.)
See also:
http://www.mrc-cbu.cam.ac.uk/Imaging/Common/epimasking.shtml
|

